Documentation Menu
Automated Scheduling Pro
Diogen AI Pro was built for set-and-forget content generation. Instead of manually creating posts, you can queue up topics and let the Scheduling Engine publish them at regular intervals.
1. What is the Scheduling Engine?
The core of Diogen AI Pro is its robust cron-based scheduling system. It allows you to transform your generated Topics into published posts on full autopilot without lifting a finger. It operates securely in the background using WordPress's native cron system.
2. Configuring the Scheduler
Before launching your first automated campaign, you'll need to set the general scheduling rules.
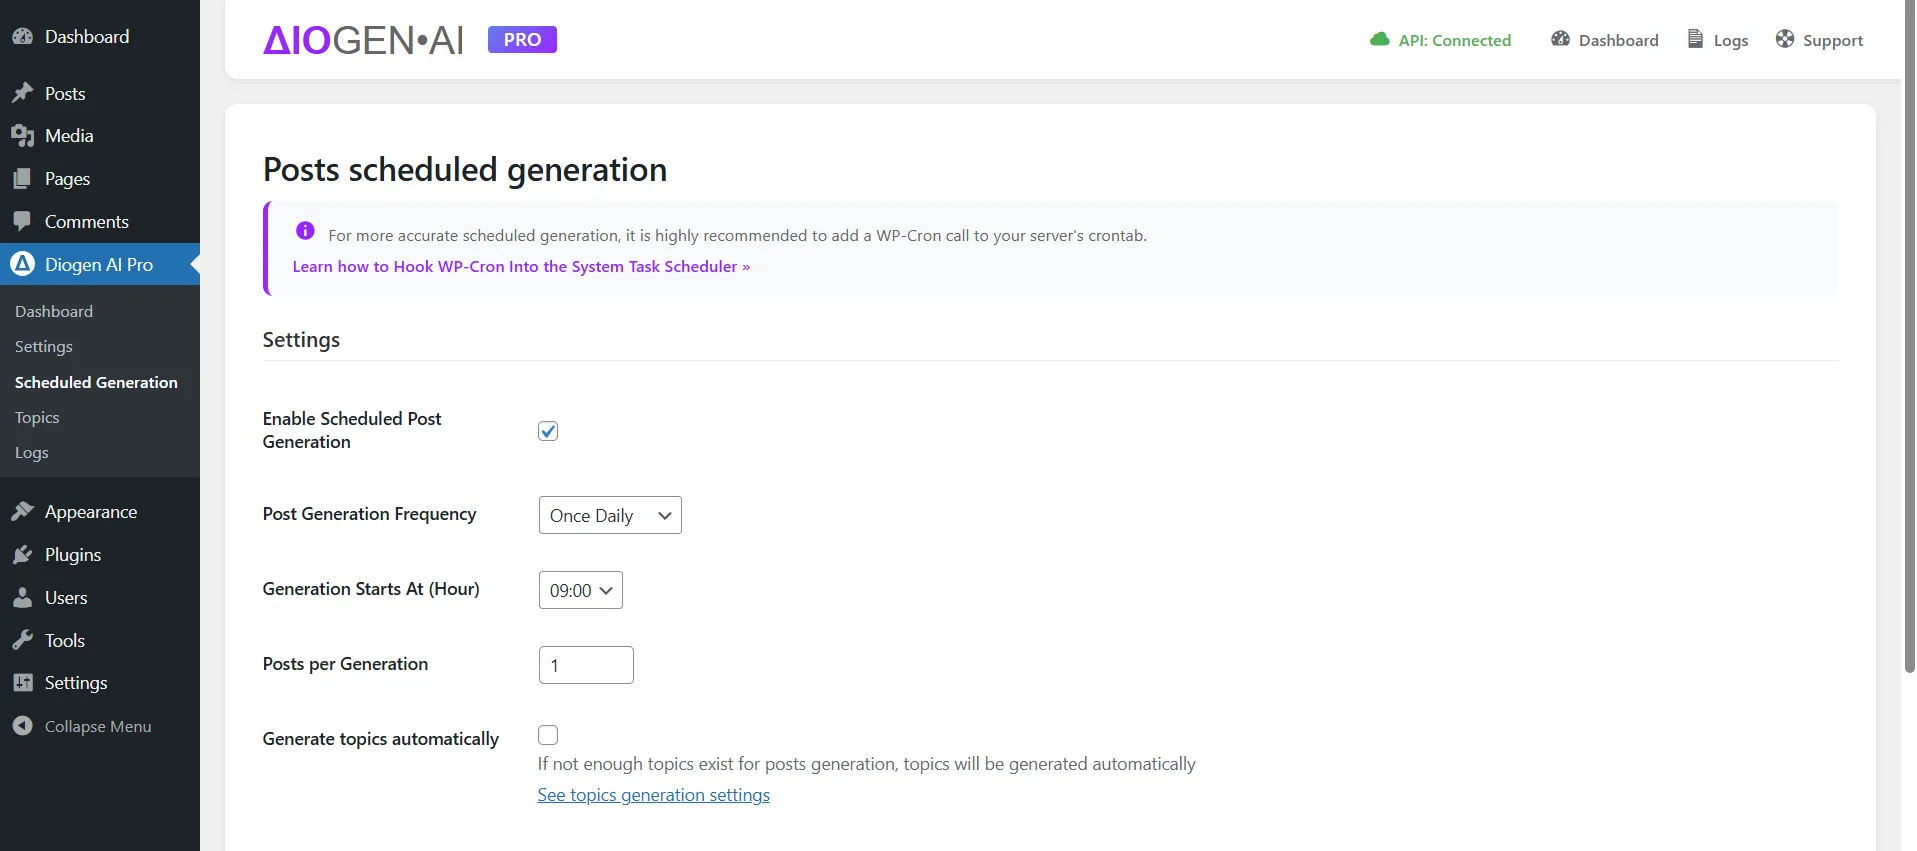
- Navigate to Diogen AI > Scheduled Generation.
- Check the 'Enable Scheduled Post Generation' checkbox.
- Select your preferred frequency (e.g., Twice a Day, Daily, Weekly).
- Set the generation start hour.
- Set quantity of post to create per generation.
- Check Generate topics automatically if you want new topics to be created automatically
- Save settings. You always can check scheduled generation status on the plugin dashboard.
3. Topics Queue
The schecduler engine will methodically go through the topics list based on your defined frequency.
- Go to the Topics page and check generation queue.
- Add, edit or delete topics in the queue if needed.
4. Smart Author Management
One of the most powerful Pro features is setting autors per category. You can define different WordPress authors for different categories.
For example, if you have a fitness blog, your "Nutrition" category posts can be automatically assigned to the Author "Chef John," while your "Workout" category posts are authored by "Trainer Sarah." This is configured in the Pro Settings > Author Mapping setting.
Debugging: You can monitor every scheduled run on the Logs page. The logs track success, generation data, and errors to ensure your content pipeline is running smoothly.